Showing posts with label Canning. Show all posts

Wednesday, August 28, 2024

Strawberry Jam 2024


I've barely posted anything this year, but I wanted to remember a few things about my jam making this year.  First of all, the Ferber method of jam making once again didn't work for me.  I am never going to try one of her recipes ever again.   I am going to stick to my tried and true method for making it.   Just for record keeping's sake, 1 flat of strawberries were 24 c halved and hulled berries.     I paid $48 for a flat.   The yield was 18 half pints of strawberry jam.    I haven't made any other jams yet but am freezing berries for fall canning. 

Tuesday, September 05, 2023

Sweet Corn Memories


Since I have moved to the Keweenaw, I have really missed some great produce you just can't get up here.   For example, there really isn't local cantaloupe and watermelon.  I had to buy canning peaches when I was downstate in Traverse City last weekend.   And the sweet corn at the farmer's market has been a big disappointment.    I did find some great sweet corn for sale at the gas station at the Indian reservation in Baraga from Johnson Farms.  I bought a dozen ears and we ate some, and I made corn relish with the rest. 

It was 92 degrees today, and too hot to can anything, but I needed to get it done so I got going.   First, I made some hot pepper jelly with the bumper crop of peppers I have growing in my Earthbox which I have had for about 20 years.   I grow tomatoes and peppers in them, and they work great!  Then I set about to make the corn.   Whenever I shuck corn, it takes me back to the St. Sylvester's Usher's Club picnic when I was a kid.  My dad was president of the Ushers Club, and we'd head out early to the K of C picnic grounds early in the morning to help get ready for it.  I can remember thinking it was so far away and up north, but it was actually only on 21 Mile.  Back then, Shelby Twp. was considered "the sticks".    We'd go up early and Mr. Jakubowski used to make up a bunch of bacon and scrambled eggs for us to eat and a big pot of coffee.    We kids would be put to work shucking corn for the corn roast.   

When the picnic started, they'd roll out the barrel and the bar would be open.   To eat, we'd have hot dogs, corn, and a grilled sausage that was called "Polacki" that was a cross between kielbasa and a hot dog and was served with kraut and onion and mustard.   I remember thinking Polacki was a funny name because it sounded like "Pollack" which was a derogatory name people called us Polish people in Warren.   There was always a Moon Walk that we kids could jump in all day long, plus contests like the 3 legged race and and a sack race, plus there was a treasure hunt where tons of pennies were buried in sawdust.  The picnic lasted well into the night, when the "Wheelbarrow of Cheer" raffle winner was announced.   I don't think I've ever seen a Wheelbarrow of Cheer since I left Warren - it's a wheelbarrow full of booze.   

The picnic was always around the end of August, close to my mother's birthday on Aug. 26.  The weather was always super hot.  That made the water balloon toss a welcome respite.  I can remember the scandal when a woman names Sue Earl tried to sign up to be an usher at church.   The usher's club took a vote and decided against letting her do it, she could join the altar society instead.   None of this women's libber stuff for St. Sylvester!   Back in those days, we had a Catholic church on every corner in Warren, but that eventually dwindled.  St. Sylvester merged with St. Edmund,  in June 2013 on the St. Edmund site, and became St. Faustina.  A good Polish saint!  I wonder if they have a picnic and a wheelbarrow of cheer and some polacki? 

Wednesday, August 31, 2022

Thimbleberry Jam 2022


It was a banner year for berries.   I started picking them the last week of July and continued all the way through mid August, freezing them as I picked.   this year I got 6 lb 6 oz of berries, and it resulted in 20 half pints of jam.

Thimbleberry jam is the easiest jam ever to put up.   Here is how I do it!


I have an outdoor canning rig, which makes it super easy and fast cleanup.  I stay nice and cool and I just hose down the driveway when I'm done.   Happy canning!


Wednesday, December 29, 2021

Canning 2021: life during construction

We moved to the Keweenaw in March and most of my stuff was in a storage unit in preparation for our construction project.  I had no kitchen for most of the summer, so we cooked on our back deck on my propane canning stove or on the grill.   We also canned, so I am counting my pantry as my mason jar themed project.   Definitely UP themed....the green pickles were made from dill, cukes and peppers sourced from North Harvest CSA farm in Calumet, the lighter colored pickles were made from a cuke called "Salt and Pepper" from Minnie Farms (I'm not sure where they are located but were regular fixtures at the Calumet Farmer's Market) and the salsa made from tomatoes and jalapenos from Whispering Wild farm in Toivola.   Peaches were hard to come by locally, so I had the produce manager at the Keweenaw Co-op order me a half bushel from Traverse City.   One of the great benefits of being a co-op owner is you can buy things in bulk at 20% over wholesale.   It was a bad year for thimbleberries as we got no rain.   I never got around to making any Chassell strawberry jam with the berries I got.    


not much of a pantry!

I'm looking forward to more canning projects next year.    I probably should have made more salsa, from the looks of it.   Happy canning! 


Sunday, May 17, 2020

Whole Wheat Rhubarb Streusel Muffins


If you are looking for a great springtime canning recipe, I recommend stewed rhubarb.   Super easy to can and it can be used as a topping for vanilla yogurt or with pork roast, or in a variety of baked goods.   Very versatile!    Here's how to do it, plus a tasty recipe for rhubarb muffins.  

Stewed Rhubarb
Makes about 18 half pints (two canner loads) of rhubarb

7 lbs rhubarb
5 cups sugar

Trim off leaves. Wash stalks and cut into 1/2-inch to 1-inch pieces. In a large saucepan add sugar to fruit. Let stand until juice appears. Heat gently to boiling. Fill jars without delay, leaving 1/2-inch headspace. Adjust lids and process for 15 minutes.

Whole Wheat Rhubarb Streusel Muffins
For the muffins
1 half pint jar of stewed rhubarb
1 large egg
1/2 tsp vanilla extract
2 tbsp vegetable oil
½ cup  all-purpose flour
½ cup whole wheat flour
2 tsp baking powder
¼ tsp kosher salt
1/4 tsp cinnamon
1/4 cup brown sugar

For the streusel topping
1/2 cup flour
1/4 cup brown sugar, packed
1/2 teaspoon cinnamon
3 tablespoons unsalted butter, cut into small pieces

Preheat oven to 375 F.  Grease medium muffin pan with butter.  In a small bowl, mix stewed rhubarb, egg, oil and vanilla with a fork until well combined.   In a medium bowl, mix remaining muffin ingredients and then add rhubarb mixture and stir until well combined.

To make streusel topping, put all ingredients in a small bowl and rub between your fingers until the mixture resembles pebbly small sand.  

Fill muffin tin cups 2/3 full with muffin batter and top each with some streusel topping.

Bake for approximately 15 minutes until golden on top. A skewer put in the middle should come out clean when the rhubarb muffins are done

Sunday, November 03, 2019

Tomato Kasundi


Summer is officially over!  I bought the last of the tomatoes that Sharon Alexander had left in her market.   She is closing down for the season today, and the tomatoes she had left were marked down and had seen better days, but I knew they would be fine for this canning project.   I cut off the spots that weren't looking too good.   I also threw in some of her green tomatoes since I didn't have enough ripe ones.    She had lots of her home grown red peppers on the clearance rack, and some ghost peppers too that I used for the hot peppers.    This sauce was delicious when I simmered some chicken breasts in it for dinner the other night.   This morning, I had some with my omelette.   I plan on using it for a sauce with some garbanzo beans for lunch this week as well.   I found this recipe on the Ball website, but I modified it for what I had in the larder.  Perfect end of the season canning project!

Tomato Kasundi
(makes about 4 pints)

5 pounds tomatoes, roughly chopped
1 Tbsp salt
3 red bell peppers
1 large onion, small diced
6 garlic cloves, chopped
3 ghost peppers, chopped
3 inch piece fresh ginger, grated
¼ cup brown mustard seeds
3 tsp turmeric
2 Tbsp. cumin seeds
2 tsp. ground black pepper
1 1/2 cup apple cider vinegar
1 ½ cups brown sugar

Pre-heat broiler. Toss chopped tomatoes with salt and set aside in a colander to drain excess liquid.   Broil whole bell peppers turning every few minutes, until skins are charred. Remove peppers to a bowl and cover with plastic wrap, let rest 15 minutes or until skins easily peel off. Seed and chop peppers.  Toast black mustard seeds, cumin seeds, black pepper and turmeric in a small skillet for 2 minutes over low heat, until fragrant. It smells fantastic! Combine chili peppers, garlic, ginger and spices in the bowl of a food processor and pulse a few times to puree. Add a tablespoon of the vinegar to loosen if paste is too thick.

Heat vinegar and sugar in a large pot over medium heat, add pureed seasonings and bring to a simmer. Add onions and red peppers. Strain tomatoes and add to seasonings in pot. Simmer, stirring frequently until all tomato liquid has evaporated and the kasundi is thick, between 60 and
90 minutes.


Prepare boiling water canner while kasundi is cooking. Heat jars in simmering water until ready to use, do not boil. Wash lids in warm soapy water and set aside with bands. Ladle hot kasundi into a hot jar leaving a ½ inch headspace. Remove air bubbles. Wipe jar rim. Center lid on jar and apply band, adjust to fingertip tight. Place jar in boiling water canner. Repeat until all jars are
lled. Process jars 20 minutes, adjusting for altitude. Turn off heat, remove lid, let jars stand 5 minutes. Remove jars and cool 12-24 hours. Check lids for seal, they should not flex when center is pressed.

Sunday, October 20, 2019

Pickled Cauliflower


How did September fly by without a single blog post from me?   Too much business travel, that is why!  I am glad to be home.   Back in September, I taught a canning class for the Ann Arbor District Library, and only 2 people came.   I am wondering if the canning fad has officially ended?   I made this pickled cauliflower, which is an excellent side dish for a work sack lunch or a picnic.   I love making pickles that can stand in for a salad.    We made this recipe from the Penn State Extension Service  but I subbed in hot peppers for the mild ones.   It came out quite good!  I entered it into the Downtown Home and Garden pickle contest, but once again, the 1st place winner wasn't really a preserved pickle.   It was some cucumbers marinated in lemon juice in a jar.   I finally broke down and wrote them a message about having a separate category for those kind of pickles.   After all, you don't need to buy a case of canning jars if you are making a refrigerator pickle like that, or freezer jam.    Anyway, if you want to make a *real pickle* try the Penn State recipe!  It's great....I've also made it with brussel sprouts before.   Delicious!

Saturday, August 17, 2019

Thimbleberry Jam 2019


It was a cold wet spring in the Keweenaw, so the thimbleberries were a bit late this year, which was lucky for me because it aligned with our August vacation.   I had a little over 2 lbs of frozen berries from a couple summers ago, and we picked about 4.5 lbs of berries this year. 


How I make jam is equal parts, by weight, with sugar.  That's it - no pectin needed.   We were short on jelly jars here at the lakehouse....they must all be downstate.   I went to Swifts to buy lids, not realizing I had way too many up here already.   I am short lids at home, my canning kitchens have become unbalanced.  


One of the best purchases I have ever made for canning is the outdoor canning rig I got several years ago.  I love canning outside!  Our total yield for this year was 112 oz. for about 9 hours of work total, including picking.    

Sunday, August 26, 2018

Salsa 2018


A review of my blog indicates I've been canning salsa for at least 12 years.   I started my blog in 2006, and I have a post about salsa making that year, but I know I was doing it long before I was blogging.    I had ordered a booklet from the University of New Mexico Cooperative Extension Service about canning salsa the first summer I lived here, which was 1992.  I've tried several different recipes over the years until I settled on Salsa #5, which is the best canned salsa I have ever tasted.    I came upon that recipe in 2010.   Looking back, I bought a half bushel of tomatoes from Ann Ruhlig in 2010 for $12.   I just spent $20 to buy that amount from Goetz Farm, which has been my tomato supplier since Ann doesn't do it anymore.  In 2013 I made 24 pints of salsa from a half bushel of tomatoes....in 2015 33 pints from a half bushel....same in 2016.   I didn't can salsa last year, I'm not sure why.  I must have forgot.   But it has been a long winter without any; I've had to buy store bought salsa, which pales in comparison to mine. 

This year, it looks like I got 31 pints out of a half bushel.   It was a 2 day affair; my friends Patty and Ellen helped me with the tomatoes yesterday.  I sliced the peppers and onions in the food processor.   I started canning when I got home from church and the grocery store about 1:30 and I just finished.    Note to self: never plan anything exotic for dinner on a canning day.   I was going to make a special Sunday dinner but I have no energy left for it.   Oh well.....Jane is too busy to come over for dinner and Eddie and his girlfriend are home for a few days but they are out and about so it looks like sausage on the grill and potato salad for us.   Time to kick back and take it easy! 

Sunday, August 05, 2018

Dill Pickles


It's been a while since I canned anything for myself...since the kids have moved out, we just haven't gone through the pickles as fast as we used to do, even though they are always asking for a jar when we visit.   Andy  noticed he was taking the last jar out of the canning cupboard when he was making some tuna salad the other day, so I decided it was time.   I also need to make some thimbleberry jam and some salsa, and I have been thinking about canning some chicken breast as well in the pressure canner.

My favorite pickle recipe is one I came up with in 2010 when I was part of this canning group of bloggers called Tigress' Can Jam.   I wonder what happened to Tigress?   She was a Brooklyn based food blogger and DJ and her blog is no longer.   But I met so many other bloggers there, and clicking through the list so many are not doing it anymore.   They typical pattern is they stop posting, then get the idea to move their blog over to Word Press from Blogger, and then it dies.  I fear food blogging is a dying form, but I'm still at it.   I can remember back at the height of food blogging, I'd post about once a week.  Now, it's about once a month.   We used to have a group of food bloggers called Michigan Lady Food Bloggers that would get together for potlucks and I think I might be the only one that is still blogging.   Sad!


Here's my pickle recipe...I was trying to recreate something that tastes like McClure's Pickles. 

 McClure's Style Fresh Dill Pickles

8 lbs small pickling cucumbers, sliced in half or quarters longwise
28 cloves of garlic (about 2 heads) peeled
16 dill heads, with sprigs (or 14 t. dill seeds)
Pickle Crisp
Optional 12 small dried hot chili peppers
5 cups vinegar (white or cider)
6 c. water
1/2 c. pickling salt


Place 2 cloves garlic. , 2 dill heads and 2 hot peppers and 1/8 t. Pickle Crisp in the bottom of wide mouth pint jars.   Pack with as many pickle halves and spears as possible tightly in each jar.  Prepare a brine with vinegar, water and salt by placing in all ingredients and stirring and heating until brine boils.  Fill jars to 1/2 inch headspace, place lids and bands and hand tighten. Process in a boiling water bath for 10 minutes.

I used to make these with a wild grape leaf tucked into each jar, but didn't bother with it yesterday.   Grape leaves are supposed to help keep pickles crisp.   I like to use Ball's Pickle Crisp  to help keep my pickles crisp these days when I am canning.


Sunday, September 10, 2017

Cowboy Candy


Last year, I came across a pickle I wanted to try called "Cowboy Candy".....a sweet hot jalapeno pickle.   I never got around to it last year, but this season, I noticed some new fb friends Libby and Liz that I met through the Michigan Tech Parents facebook group were both making some, so it inspired me to try my hand at it.   I found a farmer with lots of jalapenos, well priced, at the Ypsilanti Farmer's Market, so I picked up a bunch to add to what I was already growing in my patio garden.

I started googling around for recipes and noticed that most had a huge amount of sugar in them, so I decided to develop my own recipe with less.    I also didn't want to add too much seasoning to distract from the taste....one popular recipe included celery seed, which I thought would be too overpowering.   I did like the addition of turmeric; it gave the peppers great color

Cowboy Candy
makes about 6 half pints

Ingredients
3 pounds fresh firm, jalapeno peppers, washed
2 cups cider vinegar
4 cups white granulated sugar
1 teaspoon turmeric
12 cloves garlic, peeled

Wearing gloves, remove the stems from all of the jalapeno peppers.  Slice the peppers into uniform 1/8-1/4 inch rounds. Set aside. In a large pot, bring cider vinegar, white sugar, turmeric to a boil. Reduce heat and simmer for 5 minutes. Add the pepper slices and simmer for exactly 4 minutes. Use a slotted spoon to transfer the peppers, loading into clean, hot canning jars to within 1/4 inch of the upper rim of the jar. Turn heat up under the pot with the syrup and bring to a full rolling boil.

Use a ladle to pour the boiling syrup into the jars over the jalapeno slices, leaving 1/4 inch headspace. Wipe the rims of the jars with a clean, damp paper towel and fix on new, two-piece lids to finger-tip tightness.

If you have leftover syrup, you could can it in half-pint or pint jars, too. I used mine to marinate some pork chops.  Process in boiling water bath for 10 minutes.


These pickles are great out of the jar and not very spicy.  The sugar tempers the bite.   They are great on sandwiches or served over cream cheese as an appetizer.

Tuesday, August 22, 2017

Canning at the Chelsea Fair


I have never entered anything in a canning contest at a fair, but I decided this year I would give it a try at the Chelsea Fair.    It is held each August in the next town over, Chelsea.  Here's how I did:

First place
Corn Relish (I was the only entrant!)

Second Place
Salsa #5 - very proud of this as there were 9 entries
Bruschetta in a Jar 
Pickled Cauliflower   from Linda Ziedrich's Joy of Pickling, one of my favorite canning books
Mustard Beans
Stewed Rhubarb

Third Place
Rhubarb Jam - this recipe without the Earl Grey tea

Fourth Place
Pickled Asparagus  from the University of Georgia's Center for Home Food Preservation.   One day I will visit that place in person!  I often find myself in Athens, GA for work.

I was surprised that pickled asparagus came in 4th, I thought it looked the best.   This type of canning contest is really a beauty contest, they don't taste the entrants.    When we used to have the Classic Michigan State Fair (RIP), they tasted them.    Probably a better way to do it!

Monday, September 05, 2016

Salsa 2016


This year, I looked at my pantry and I had exactly 1 jar left of salsa from last year, and my records indicate that I made exactly 3.78x of my best recipe Salsa #5.   So I decided to make 4x this year.  Sadly, my usual tomato purveyor for the past 10 years Ann Ruhlig is out of business, so I bought tomatoes from Goetz farm at the Ann Arbor Farmers Market.   My yield was 31 pints, which is interesting because last year, I got 33 pints.  Oh well...maybe the tomatoes were more meaty this year.   I used a mix of poblanos and jalapenos; my trusty canning buddy Ellen decided to slice some of the jalapenos in rings to make them look even better in the jar.   Ellen and I have been canning together for years, ever since Ann moved away to upstate New York.  


I used my outdoor canning kitchen again which is the best thing ever!  When I am all done, I just have to hose off the driveway.   Plus it's so much cooler outside; in the morning I had to wear a jacket.  A new purchase this year, a flame tamer really helped prevent scorching.


It sits between the fire and the canning kettle to prevent scorching.   Great add to my canning supplies.   I also cleaned out my pantry and got rid of some of the old stuff that never got eaten, like the pickled green tomatoes or the peaches I forgot were there.  

bbq sauce from 2013?


So far, I've made salsa, strawberry and thimbleberry jam so far this year.   Not sure what I want to make next.  

Monday, August 15, 2016

Thimbleberry Jam

When I was a student at Michigan Tech, I spent a couple summers in the Keweenaw, and I vowed back then that I would someday make my own thimbleberry jam.    It finally happened!

Thimbleberries...from the watercolor journal of Marilynn Brandenburger
check out her work here


Growing up downstate, I had never heard of thimbleberries, which I'd describe as a floral, tart raspberry with smaller seeds.   They are also much easier to pick than raspberries, because they have no thorns.   They come into season in the beginning to mid August, and so I planned a trip to our place on Lake Superior to hopefully be timed with the ripening of the berries.   All the souvenir shops in the Keweenaw sell thimbleberry jam, but my favorite place to get it is the Jam Pot  a bakery and preserves spot in Eagle River.   I've always been inspired by their preserves...everything from wild gathered chokecherry and bilberries and rose hips to thimbleberry, their most popular.    It's currently selling for $18 a jar.    I noticed American Spoon is selling it for $23 a half pint.   So I put the family, and our friends Ray and Jen who were up visiting, to work picking berries.   

Thanks to the internet, I found that thimbleberries, unlike raspberries, don't need added pectin.   The recipes I found said to use equal volumes of berries and sugar and to bring it to a boil.   I decided to use equal amounts of sugar and berries by weight instead.   Thimbleberries are very fragile -- we collected them in bags and then put them in a bucket.    They turn into a a sludge almost immediately upon picking them  I poured them and their juice onto a cookie sheet to pick out any detritus (twigs, stems, the occasional tick) and them combined it with an equal part by weight of sugar.   I brought the mixture to a boil for 3 minutes, which seemed to be the average out there on the internet.


After 3 minutes of stirring constantly, I put the jam in hot half pint jars with 1/2 inch headspace and processed for 10 minutes in a boiling water bath.   


 We picked 7 lbs of berries, which resulted in 22 half pints of jam.....that's about $400 worth of jam!  


Sunday, June 05, 2016

Rhubarb Jam with Susan


Rhubarb is one of my very favorite things to eat.   Of course, there is pie....


I made these pies earlier in the season to celebrate the Kentucky Derby and for a woman that won my silent auction donation of "Pie Of The Month" at church.   

Today, I've got a canning project lined up with my friend Susan.   I usually can stewed rhubarb, which I like to eat with yogurt and granola in the morning, but I haven't the past couple years.  I've gotten away from canning things only I will eat around here.  Taking a stroll down memory lane,  I am humored by my rhubarb canning posts from years past.   There's this one, about me trying to can rhubarb in mid May for a farmer's market demo during a bad storm.   And then there was another year when I was doing the same thing  and there was a tornado warning.  That day, a bridge washed out on Maple Rd. in Ann Arbor.   It's only fitting that we got a ton of rain yesterday and we are under a small stream flood advisory in Washtenaw County and the forecast shows more rain for today. Susan and I are going to make rhubarb jam, because she has fond memories of doing the same with her Grandma when she was a little girl.   I am fired up to make jam myself since I spent some time last weekend at the Jam Pot in Eagle River.  Plus, I think the family will eat it.   


I am inspired rhubarb jam inspired by a couple recipes I have seen on the internet and in my canning book collection.   First, I found a recipe in Marissa McClellan's canning blog "Food In Jars".   (if you haven't yet checked out any of her canning cookbooks, you should!).   I liked the combination of vanilla bean and Earl Grey tea, but I don't use commercial pectin.   I looked in another favorite canning cookbook, Linda Ziedrich's Joy of Jams since she and I are of the same mind about commercial pectin and her recipe doesn't have any added, but calls for overnight maceration a la Mes Confitures.   I don't have time for that....I am going to pick rhubarb this morning at my friend Dan and Joe and Lisa's house.   It's always good to have friends with rhubarb!  Some more googling around led me to Leite's Culinaria and another great cookbook in my collection, Urban Pantry  by Amy Pennington.   Her recipe has a lemon added for pectin.  I am not confident rhubarb has enough pectin in it to set on it's own, and I have seen conflicting reports on the internet, Some recipes say you need it, some say you don't.   I can't find any actual pectin content data, so I am going to play it safe and use lemon for good measure.  Plus, I think the flavor will be nice with the Earl Grey tea,   So, here's the recipe I developed for today's canning ventures.....

Rhubarb Earl Grey Jam with Vanilla
makes about 5 half pint jars

4 lb. rhubarb cut into small chunks
4 c. sugar
1 1/2 c. boiling water
2 Earl Grey tea bags
1 vanilla bean, split
1 lemon

Prepare canning jars and water bath canner. Since this recipe has a processing time of 5 minutes, the jars need to be sterilized.   Read here to learn about how to do this.  Combine rhubarb and sugar in a large bowl, mixing until all the rhubarb is covered.    Juice lemon, reserving seeds and rind  Put the seeds in a tea ball or tied in a cheesecloth pouch.   The seeds and peels will provide pectin.  Brew tea in water for a couple minutes.It should be strong.   Combine rhubarb mixture, tea, lemon juice, vanilla beans, lemon rinds, and lemon seeds in a  large pot, and bring to a boil.  Boil for 15 minutes, stirring constantly and skimming the foam.  Check temperature at this point.   The goal is to get to the gel temperature of 220 F.  (+8 F from the boiling point of water at your elevation.  For less than 1000 ft. use 212+8 = 220 F)  Reduce heat to simmer and stirring frequently, simmer until it reaches 220 F.   Remove from heat.   Remove rinds, seeds, and the vanilla beans.  Ladle in prepared jars, leaving 1/2 inch headspace, process in boiling water bath fore 5 minutes.

I just looked at the radar....of course there is a big storm coming our way! It's time to can some rhubarb, I guess.

Monday, September 07, 2015

Salsa 2015

This year, I canned my favorite (and most difficult) item to put up: salsa.   It's the one thing I make that I can't seem to have enough of in the house.  This year, we ran out about April, so I made 33 pints.   I bought a box of Roma tomatoes from Ruhlig's produce and commenced to prepare my favorite salsa recipe Salsa #5.  I had to scale up the recipe based on the amount of tomatoes I had in my box, which was 26.3 lb, or about 3.78X the original recipe.   It's very important to keep proportions accurate when making salsa, or you could end up with botulism.  Here is my math:


It also was the maiden voyage on my new outdoor canning kitchen.  I did break it in at a canning class that I taught last weekend.  It was great to be able to can outside on such a hot day, plus, I could just hose off the garage floor when I was done.   I still did all my chopping in my own kitchen, but I peeled the tomatoes on my camp stove instead of in the house and it was way better.   Plus, the propane high burner can get my canner boiling in no time.  


I ultimately used 2 boiling water baths at a time, which made the whole project, start to finish, get completed in a little over 4 5 hours.   My friend Ellen stopped by to help for a couple hours.


 Ready for winter now!!!

Friday, May 01, 2015

Why Canning?

My moment of Zen: Pear Vanilla Jam


In these very busy times, people often ask me how I possibly have time to preserve food and the answer is simple…I make time to do it.   I have a 50+ hour week job and a husband and kids, but I take the time to preserve food every year.  Why?  First of all, canning provides me the opportunity to slow down and spend some time with family and friends.    There is no “hurrying up” the process; the time it takes is what it takes.  No shortcuts, except that many hands make the work light.   To borrow the old phrase about “making hay while the sun shines”, Mother  Nature waits for no one.    When the strawberries are ripe, you’ve got a short window to make jam.   No putting it off for a few weeks.   I can remember coming home from a long work week and spending a stormy Friday night with my friend Ellen putting up peaches and drinking wine.   Best happy hour ever!  

Preserving food grown locally requires me to make a connection with a farmer.    I have my favorite farmer’s phone numbers programmed into my phone  so a quick text is all that’s required to know whether there’s a bushel of tomatoes waiting for me to make into salsa.    The foods I preserve must be better (and often cheaper!) than what I can buy in the grocery store.    A jar of my homemade salsa is way more delicious, and costs about half, of anything you can get on the shelf.     But the most important reason why I preserve food is that when I open that jar months later, I have the memory of making it.   Currently, the jar of pear vanilla jam shown above is sitting on my desk at work, getting ready to be added to some yogurt and granola for my lunch.   But just seeing it reminds me of last fall, when I was deep in the process of making that pear vanilla jam.  

At first, I was going to pick some pears from my friend Liz’s tree, but by the time I got there, they were gone.  As usual, Mother  Nature had no time to wait for me.   Then, in late fall,  I drove out to the west side of the state to meet up with some friends and on the way back, I stopped at a farm stand in Michigan’s “Fruit Belt” to see what was left on the shelves.   Nothing but pumpkins and apples, but then I spied a bag of pears in the back!  YES! I got back and the pears languished in the fridge a few days.    I carved out some time to make the jam, adding some vanilla bean scrapings for good measure because I thought it sounded good.    The pear jam (along with other items from the canning pantry like red currant jelly and wild grape jam) were gifted to family and friends all through the holidays.   My daughter and her boyfriend came home from college for spring and had some for breakfast….they thought the label said “Pearl Jam”, which made them laugh.   They loved it so I sent them back to school with a jar.   And now a jar sits here with me in May in my office, reminding me to take some time to enjoy it, and plan what I am going to put up this summer.  

Here’s to the future!

Saturday, October 04, 2014

Jam and Jelly Contest

This year, I am entering the Downtown Home and Gardens annual Jam and Jelly Contest.   I haven't entered it in a few years because I usually don't make all that much variety...usually just some strawberry jam, but this year I've been obsessed with foraging wild fruits and started making jelly for the first time ever.


I don't know why I hadn't tried jelly making before - I had a jelly bag for years but I thought it would be a hassle to have to hang it and wait for the juice to strain, but it is actually easier in a lot of ways than making jam that needs added pectin or apple butter, that require putting the fruit through a food mill.   I use my KitchenAid fruit & vegetable strainer, which makes it easier, but it still is a lot of cleanup.     I have one that can stand on my large measuring bowl:


and it's easy to boil down the fruit and hang the bag overnight to make the jelly the next morning.   If the fruit needs extra pectin, I've thrown in an apple (or a hand full of crab apples) seeds, peels and all into the boiling fruit - no food mill necessary.

This year, it's been my goal to forage wild fruits for jam.  I was inspired by my visit to the Jam Pot in the Upper Peninsula this summer.   We took our son for his campus visit at our alma mater, Michigan Tech, and while we were up there, we stopped for some of stellar baked goods at the monastery.   I was reminded about when the brothers started their work, they used to forage for thimbleberries and rose hips at the house I lived in during graduate school, and after surveying their wild berry jams, I knew I wanted to try my own this year.  

In our neighborhood, there is a bumper crop of wild grapes.   Usually, I've used their leaves to help keep my pickles crisp, but the fruit is too sour to eat out of hand.   I did a little research and found out it makes excellent jelly, so I tried it out and the flavor is stunning...so much better than grocery story stuff.   Check out how I did it here.    Last fall, I made some crab apple butter from my neighbor's tree.  Her tree bears fruit every other year, and last year was it.   And then lastly I tried my hand at currant jelly.   A colleague from work is a fantastic gardener, and he has 3 currant bushes and generously gave me some.   I think currant jelly is my new favorite; tangy and beautifully colored.   The best part about canning all of this is that it is almost free!  I just had to buy the sugar and the jar lids.    I'm looking forward to making some more stuff yet this year; my church friend Liz has a pear tree with tons of pears on it she wants to give away, and there is still more grapes and crab apples to be had.   

Today is cold and rainy, so it's a perfect day to stop by Downtown Home and Garden and vote for your favorite jam or jelly....hopefully it will be mine!

Sunday, September 14, 2014

Wild Grape Jelly

I've had it in my mind that I want to make wild grape jelly for years.  My woodsy neighborhood has lots of wild grape vines, and I have used the leaves over the years when I make pickles.   I can remember beck when my son was in middle school and I was a cabin counselor for 7th grade camp out at Camp Storer in the Irish Hills, waiting on horseback for my group next to a huge stand of wild grapes right at eye level and thinking "When I get home, I am going to make wild grape jelly!".   And here it is, 5 years later and my son is a high school senior and I still haven't made any.  A few weekends ago, when I was on my weekend jog through the neighborhood, I noticed that the vines were heavy with fruit, so I vowed that I would do it this year.


Supposedly, it can be a challenge for some people to identify wild grapes instead of the poisonous moonseed or Virginia Creeper, but I don't think it is all that difficult.  I don't think I've ever seen moonseed, but we have plenty of Virginia Creeper around here.   For more info, read this blog post here.  I picked about 3 pounds of grapes last weekend, and then I consulted my trusty The Joy of Jams, Jellies, and Other Sweet Preserves.   Linda Ziedrich said that the wild grapes that she has in her Pacific Northwest backyard didn't make good jelly, but most varieties would.   I wasn't sure what kind we have, but I decided to give it a shot.   I looked around on the internet, and most of the wild grape jelly recipes had boxed pectin in them, but Linda said that it shouldn't be needed, but recommended adding some apple for extra insurance.   Since their was a couple crab apple trees right next to the grape vines, I decided I'd add some of those instead.


Wild grapes, unlike domestic grapes, are high in tartaric acid (from which cream of tartar is produced), will form crystals in the jelly so you need to let it settle out overnight before making your jelly.   After cooking down the grapes, strain out the juice and let it sit in a container in the fridge.   I actually let mine sit for a week because I couldn't get around to making the jelly anytime during this busy week.  I let it pass through the jelly bag yesterday afternoon and it left a ton of sludge in the bag.  Who knew?  If you eat a lot of wild grapes raw, this stuff is what makes your mouth feel dry and cottony.

Wild Grape Jelly
makes 3-4 half pints

3 lb. wild grapes, stems and all
1 c. crab apples, halved, (cut of stems and blossom ends, but leave the seeds in)

Heat grapes and apples in a large pot until boiling, mashing as you go with a potato masher.  Boil for 15 minutes.   Strain and let remaining juice settle overnight.  The next day, strain juice through a damp jelly bag for 2-3 hours.   Add:

3 c. sugar

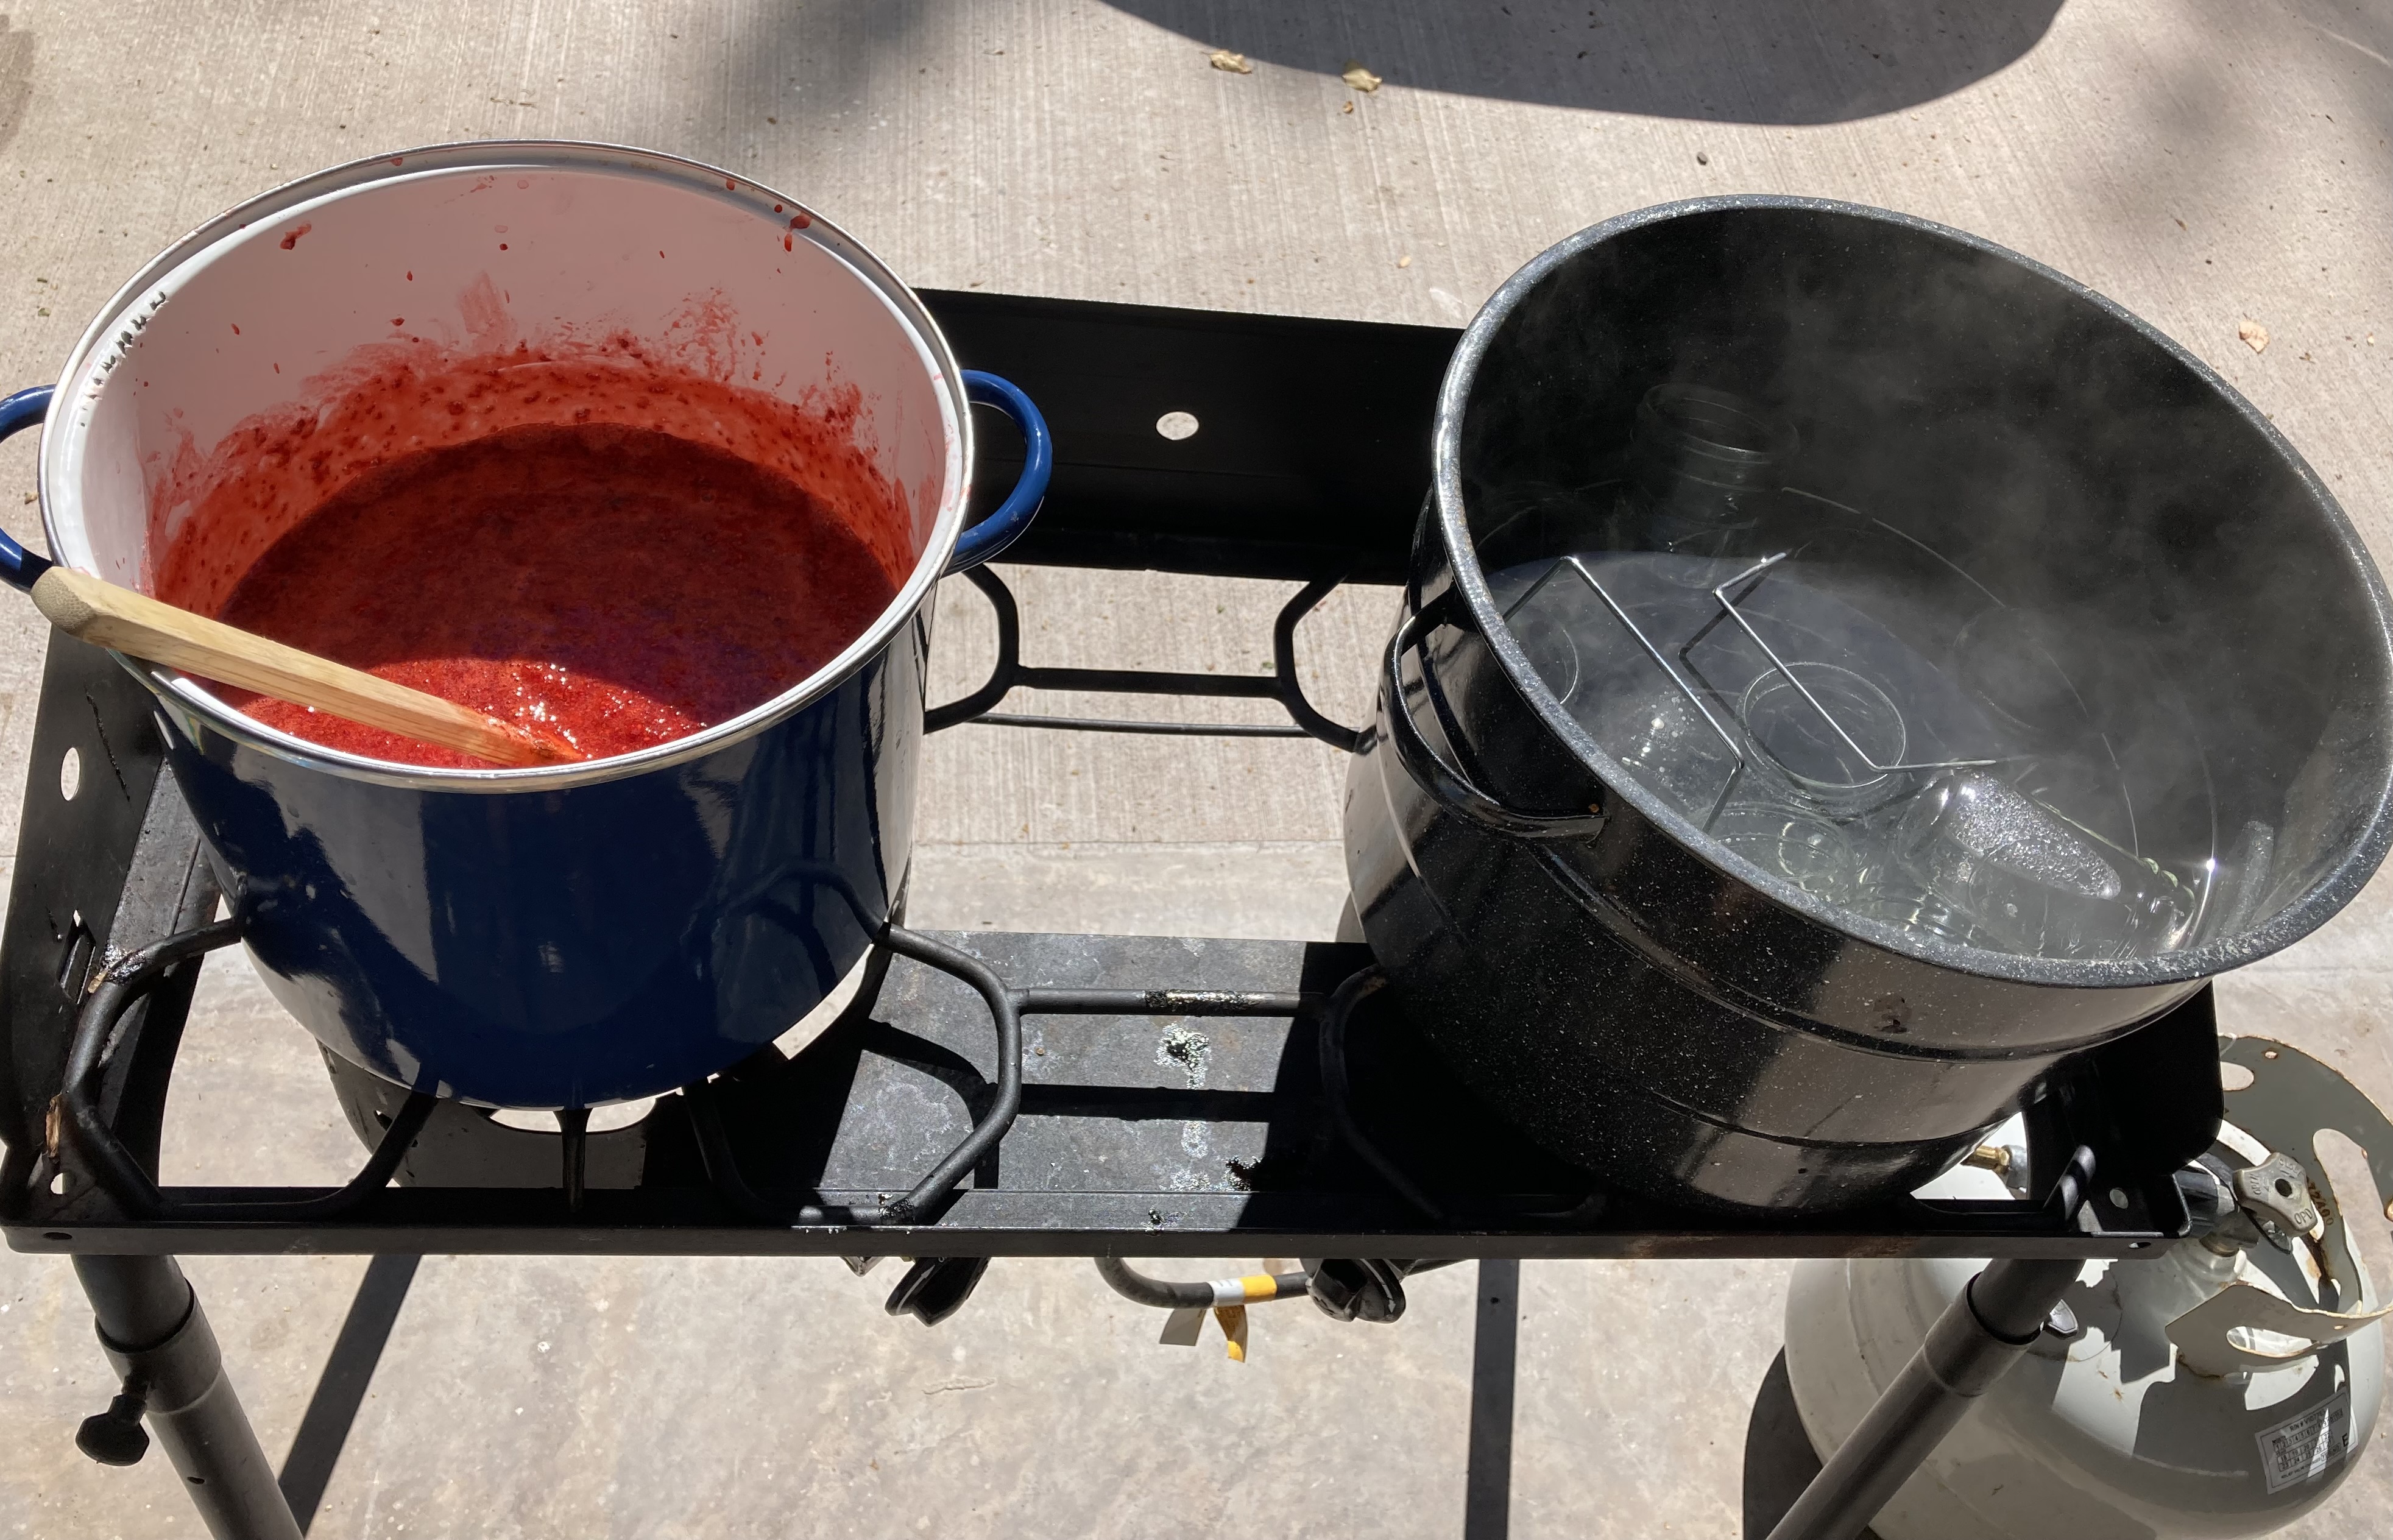
Heat juice and sugar in a large pot (I like to use an enameled cast iron dutch oven to make jams and jellies) until the jelly reaches the gel temp of 220F.   Since I live below 1000 ft elevation, water boils at 212F and gel temp = boiling point of water+8 F.  If you live at higher elevation, your gel temp will be different.  Speaking of temperature, After trying many different cooking thermometers, I have figured out that the Thermapen instant read thermometer is the best for jam and jelly making and candy.  Yes, it will set you back about $100, but it's the last one you will ever need to buy.   I've spent more than that on a pile of cheaper ones that broke or didn't stay calibrated.   Learn from my sad tale and invest in the best one to start!   

Pour jelly into clean hot jars and leave 1/2 inch headspace.  Process in a boiling water bath canner for 10 minutes.  

I was a little nervous because it didn't appear to be setting up yesterday, and so I was envisioning having some jars of grape syrup instead of jam, but when I checked it this morning, it was set!  Sometimes natural jellies (no boxed pectin) take longer to set up - up to a week!


Since I have read that wild grapes can continue to be harvested until after the frost, I can probably make some more jars every weekend when I have time.  It will make great Christmas gifts!


Sunday, July 13, 2014

Currant Jelly

I was given a gift of currants from a work friend - he has an awesome garden and had a surplus, so I stopped by his house on Thursday to pick some.  I've never made anything with currants and actually have never really made jelly....only once I made a May Wine jelly...but  that doesn't really count.  A few years ago, I bought a jelly bag, but I never had occasion to use it.   Now was the time!!


I stemmed the currants....it's debateable whether you need to do that or not.  For every lb of currants, you need to add 1/2 cup of water and heat it for about 30 minutes, mashing with a potato masher.   Then you strain....I had about 6 lb of fruit, and it made about 6 cups of juice.  Let it strain for about 6 hours.  If it's cloudy (mine was) strain it twice.  DO NOT SQUEEZE THE BAG! That will make it even more cloudy.  Making the jelly was super easy.....for each cup of juice, add one cup of sugar.   Here's how mine came out:

Currant Jelly
makes about 6 half pints

6 c. currant juice
6 cups sugar

Heat juice and sugar until sugar is dissolved.  Turn up the heat to medium high, and boil, stirring occasionally, until you hit the gel temp of 220F.   Add to half pint jars, leaving 1/2 inch head space, and process for 10 minutes.  couldn't be easier, and I actually LOVE THE TASTE! I think currrant jelly is my new favorite.  very tangy and beautiful.  I can't wait to plant some currant bushes myself.


I tried out the new Ball Platinum Jar just to see how they would look and I think they will be great for gift giving.    Lovely!