By the 5th day of Christmas, the fridge is full of half eaten leftovers and veggies that are a little bit past their prime. There is probably a flaccid potato or two complete with eyes growing in in the bin. After a few days of eating rich foods and drinking lots of wine, there's probably a New Years Resolution forming in the back recesses of my mind...."eat more vegetables in 2016". In addition, the college students are home from school, and my husband wakes up every morning after sleeping in asking "What's for breakfast?" Enter the frittata! It's a great way to clean out the fridge and feed a crowd. . It can withstand waiting around on the counter for those sleeping in. Plus, it's a really effective way to eat more vegetables. Start on my resolution a little early.
A 10 inch well seasoned cast iron frying pan is the perfect cooking vessel for frittata; it holds the heat well and cooks the bottom and a quick run under the broiler finishes the top. The possibilities are endless....just use what is taking up space in your fridge. Here's how I made mine this morning....
Frittata
2 T. olive oil
1 cup potato, diced 1/2 inch (remove eyes, but you don't need to peel it)
1/2 red pepper, diced
1 jalapeno, minced
2 cloves garlic, minced
1/2 red onion, diced
1 c. diced leftover ham (optional)
a couple handfuls of whatever leafy greens you might have (I used kale)
1/2 c. water
salt and pepper to taste
6 eggs, well beaten
Preheat broiler with oven rack in the center.
In a medium sized cast iron frying pan (or other oven proof skillet)., heat oil, potato, pepper, jalapeno and garlic and onion until onion is soft. Add ham and stir until heated through. Add greens and water and cover, cook until potatoes are soft, about 10 minutes. Remove lid, and cook until water evaporates. Add salt and pepper to taste to the vegetables. Evenly distribute the veggies in the pan, and pour in eggs. Cook on stove top until bottom is well set; then place the pan under the broiler until the top is also well set, about 4 minutes. Serve with a side salad of greens. Who says you can't have salad for breakfast? It was always served at Selma Cafe....sure miss cooking there.
Here's to your 2016 resolutions....mine is to eat more vegetables!
I'm reading a vintage 1988 book I picked up at the Dexter Library used book sale Christmas Memories with Recipes featuring many great food writers like Evan Jones and Edna Lewis with their memories of the holiday. Also included was a young "Martha Kostyra Stewart" ....her essay was written at her beginnings and her bio talks about her catering business and her book "Entertaining" and her video tapes. Since Martha was on my mind, when my daughter requested dark chocolate cake with dark chocolate ice cream for her birthday, I went right to the Martha Stewart website for ideas. I found a dark chocolate cake with a ganache, but I wanted to make a piped icing, so I found a dark chocolate icing recipe from her cupcake book online.
Recently, I got a pair of 6 inch round cake pans because I've decided 9 inch cakes are just too much cake for us. I've had good luck with making smaller cakes, except I have found that the cake seems to dome on the top. I usually just cut it off, but this time I left the top layer domed for a unique look. I've yet to try the cake strip idea, but might do it the next time I bake a cake. Here's how I scaled down Martha's recipe for my smaller cake:
Dark Chocolate Cake
1 1/2 cup unsalted butter, room temperature, plus more for pans
1/3 cup unsweetened Dutch processed cocoa plus more for pans
1 1/2 cups all purpose flour
1/4 teaspoon baking powder
1/4 teaspoon baking soda
1/4 teaspoon salt
1 cups + 3T packed lightbrown sugar
2 large eggs plus 1 large egg yolks, room temperature
5 ounces bittersweet chocolate, melted
1 teaspoon pure vanilla extract
3/4 cup lowfat buttermilk
Preheat oven to 350. Butter two 8inch round cake pans; dust with cocoa, tapping out excess. Line bottom of each pan with a round of parchment paper; set aside. In a medium bowl, whisk together flour, cocoa, baking powder, baking soda, and salt; set aside. In a large bowl, using an electric mixer, beat butter and sugar until light and fluffy. Add eggs and yolk, one at a time, beating well after each addition; beat in chocolate and vanilla. With mixer on low, alternately add flour mixture in three parts and buttermilk in two, beginning and ending with flour mixture.
Divide batter between prepared pans; smooth tops. Bake until a toothpick inserted in center of a cake
comes out clean, 40 to 45 minutes. Cool in pans 15 minutes; run a knife around edge of each pan, and
invert cakes onto a wire rack to cool completely.
For the icing, I was worried because there were comments suggesting that it came out too greasy or liquid, but in the prologue of the recipe, it said "this deep, dark, satiny frosting (thanks to the addition of melted semisweet chocolate) is a favorite of Martha Stewart Living food editors, since it has just the right consistency for spreading or piping into beautiful swirls." I knew I wanted to do some piping, so I thought I'd give it a shot. Reading through the comments, I found that those that had success followed the recipe temperatures exactly: the butter can't be too soft, the chocolate warm, etc. My only question left is the recipe said it "serves 5". What does that mean? Originally, the recipe came from Martha's cupcake cookbook, so I thought maybe it meant 5 cupcakes? But that wouldn't be enough to frost even this small cake. The rose cake decorating takes a ton of frosting. I ended up making the amount the recipe originally called for and it was the perfect amount to ice a 6 inch cake. I still don't know what "5 servings" means. Here's how I made the recipe....make sure to follow the temperature instructions.
1/2 cup unsweetened Dutch process cocoa powder
1/2 cup plus boiling water
2 1/4 cups (4 1/2 sticks) unsalted butter, cold
1/4 cup confectioners' sugar, sifted
1/4 teaspoon salt
2 10 oz. bags Ghirardelli 60% bittersweet chocolate chips , melted and cooled
Combine cocoa and the boiling water, stirring until cocoa has dissolved. Let it cool! With an electric mixer on medium high speed, beat butter, confectioners' sugar, and salt until pale and fluffy. Reduce speed to low. Add melted and cooled chocolate, beating until combined and scraping down sides of bowl as needed.
At this point, I made the mistake of refrigerating the icing bowl until the cake was cool. Don't do that! It came out of the fridge like a hard stick of butter. I had to beat it again to get it to the right consistency. Room temp is perfect for piping the roses. I am not a great cake decorator, but the rose cake technique is very easy. I use a Wilton 1M tip that I got from this set.
The roses don't need to be perfect to make a stunning cake. Here is how to do it:
Frequent readers of this blog will know that I spent 7 of the best years of my life attending Michigan Tech for undergrad and graduate school, and that I post recipes of U.P. favorites here from time to time, including pickled eggs, pasties, fishbowls and nisu (or pulla). My friend and classmate Lee has been after me for years now to post another local favorite, the house soup from the Library Bar in Houghton.
Swiss Onion Au Gratin
The Library Bar in Houghton was a favorite place of MTU students in the 1980s. It was owned by Jon Davis, a onetime MTU student who moved there and never left. Whenever I think of him, the word "bon vivant" comes to mind....
In addition to his famous bar, which he conveniently named "The Library" (so students could tell their parents they were at "The Library" studying and it would be okay), he also was the man behind the Guts Frisbee league and also a winter road rally called the "Press On Regardless" or POR. By the time I got to meet him, the Library was at it's pinnacle of popularity. Jon was easing into retirement at this time, but occasionally you could find him behind the bar in those days. I can remember a night I spent perched on a barstool there, down in the dumps for reasons unremembered now, but Jon cheered me up like a good bartender can, with equal parts listening and encouragement and beer. They had a great menu back then....excellent pizza which was all you can eat on Sundays for $5, and good sandwiches too, like the "James Beard" Reuben and the "BTO" which was what he called the best sandwich on the menu that no one ever orders but I did. It was a bacon tomato onion sandwich. The menu then looked like a book. The place had red carpeting on the walls and a 1970s vibe and a low ceiling upstairs with a sign that admonished you to "Watch out you might get hit Ontonagon". There was a guitar player named Gary Tunstall that played singalong songs like "Piano Man" and "American Pie" that the whole bar would stand up in unison and put their arms around each other and sing along in the pre-karaoke era. Jon sold the place and the bar burned down in the 1990s and has been reincarnated as a microbrewery, and it's not the same as it once was anymore. Jon passed away in 2007, but his memory lives on every MTU Winter Carnival during the Jon M. Davis Memorial Chili Run. During the all nighter snow statue building, Jon would show up in a van and hand out cups of hot Library Bar chili to students throughout the night. The MTU Alumni Association carries on this fine tradition to this day.
Another tradition is the house soup at the Library. It is still Swiss Onion Au Gratin. I've never seen this soup anywhere else ever, and I am not sure if it was a Jon Davis invention or something that came later, but it is still served today at the Library. A taste of it takes me back to my student days for sure; it's a "must have" for MTU alums, along with a pickled egg from the B&B and a fishbowl drink at the Ambassador whenever we visit Houghton. One of my sorority sisters worked at the Library and got the recipe for the soup, which I've scaled down here to make a smaller pot. Whoever invented the recipe, my hat goes off to them because it's pure genius for a restaurant...costs nearly nothing to make and is a great way to use up stale rye bread. I like to use double the onions the original recipe called out (just half them if you want the original quantity). Also, don't be tempted to use real chicken stock or anything....this recipe needs the salty boost of soup base. And definitely make your own rye croutons because they are so delicious. In a pinch, I suppose you could use the Gardetto's Rye Chips. Another note: over the years, I've found that soup base varies in concentration, so taste yours after adding the water and add more if it needs it. I like Penzey's Chicken Soup Base, but also" Better Than Bouillon" will work.
Swiss Onion Au Gratin Soup
Serves 8
4 medium onions, diced
1 T. butter
1/4 c. chicken soup base
5 1/4 c. water, divided
3 T. white wine
1 t basil
1/2 c corn starch
2 c. whole milk
Croutons
1 pkg. cocktail rye bread (or stale rye bread cut into cubes)
Garlic powder
Shredded Swiss Cheese (for topping)
To make the croutons, heat vegetable oil (about a half inch depth) in a frying pan until hot. Cut cocktail bread slices into quarters and fry in hot oil until crisp. Sprinkle hot croutons with garlic powder to taste.
In a large dutch oven, saute onions in butter until soft. Add soup base and 5 cups water (taste here to determine if more soup base needs to be added). Add wine and basil and heat through. With the remaining 1/4 c. water, make a slurry with the cornstarch and add to the soup, heat until thickened. Whisk in milk and heat through.
For my church's silent auction last month, I donated a "Pie of the Month" prize to the raffle. For the next year, the winner will get a homemade pie delivered to their home. The winner is a very nice woman named Marge who lives in Saline. I haven't yet met her in person, but we talked on the phone. She attended the auction with her son, who lives nearby and attends St. Joseph. She was concerned that Saline is too far away, but I'm looking forward to making the trip and then stopping to visit my daughter in Ypsilanti where is goes to college. For this month, I made apple pie...
I used Northern Spy apples that I got at the Ann Arbor Farmer's Market yesterday from Wolfe Orchards. Northern Spy is my favorite pie making apples; they hold up without getting mushy and are very tart. I made 2 pies - one for Marge and one for us. I used the vodka pie crust recipe and for the filling:
5 cups peeled diced apples
1 t, apple pie spice
Sugar (to taste.....1/2 to 3/4 cup) your tastebuds may vary and so might your apples
I made the pie from memory and once they were in the oven I realized I probably didn't add enough sugar to the apples. I don't like overly sweet pies, so I added just a couple tablespoons. Looking at my trusty Better Homes and Gardens: New Cook Book, I saw that it probably should have been at least a half cup; now what to do? I decided that caramel sauce was the answer. Doing some quick Googling for a recipe, I settled on one featured on the Pioneer Woman cooking show on the Food Network...not because I'm a big fan of the show but because it used half and half instead of heavy cream. I have to admit, I get sucked into watching Ree Drummond and her fantasy ranch life every once in a while when I am on the elliptical at the gym, which involves showing off her fancy house and handsome cowboy husband and beautiful children and her days solely revolved around cooking fantastic things in her well equipped kitchen. I know it's not for real, but I get sucked in anyway.
Caramel sauce
1 c. brown sugar (packed)
1/2 c half-and-half
4 tablespoons butter
Pinch salt
1 T vanilla extract
Mix the brown sugar, half-and-half, butter and salt in a saucepan over medium-low heat. Cook while stirring occasionally for 5 to 7 minutes, until it gets thicker. Add the vanilla and cook another minute to thicken further. Turn off the heat and when cool slightly pour the sauce into a jar and refrigerate.
We invited our neighbors Steve and Martha over for pie after dinner, and I served the pie with a puddle of caramel sauce and a couple small scoops of vanilla gelato. It was perfect! I'm so looking forward to making pie every month, I have ordered a new pie cookbook that I have already checked out of the library that I really liked: Ms. American Pie: Buttery Good Pie Recipes and Bold Tales from the American Gothic House by Beth Howard. She made pies at California’s Malibu Kitchen for celebrities including Barbra Streisand (lemon meringue), Dick Van Dyke (strawberry rhubarb), and Steven Spielberg (coconut cream) before moving back home to rural Iowa. She now lives in the famous American Gothic House (the backdrop for Grant Wood’s famous painting) and ran the hugely popular Pitchfork Pie Stand. It's now closed...so don't drive out to Eldon, Iowa looking for it (the house is still open for visits) Beth has moved out to Los Angeles to live near her folks and continue writing. Stay tuned for more pie!
The good people of Uncommon Goods reached out to me to see if I would be interested in reviewing one of their products, and so I visited their site to see what they had to offer. I hadn't ever heard of the company before, but was really impressed when I learned that they are an online retailer that offers products that feature unique designs and handcrafted gifts. They run all our operations out of the historic Brooklyn Army Terminal, including where the even the lowest-paid seasonal worker starts at 50% above the minimum wage. They also make it their mission to support and provide a platform for artists and designers.
I selected a macaron making kit, and was thrilled when my box arrived from Brooklyn a couple days later....
Uncommon Goods donates $1 for every shipment to one of their non profits of your choice, like American Forests the oldest American conservation organization. This non profit has planted 45 million trees since 1990. As the mother of a forestry major, I think this is great! Now it was time to get cooking....
I had heard macarons were hard to make, but some places in this town charge $2 each for them and my thrifty soul was crying out to give it a try, The kit had a silicone mat and something they call a "Decomax" which is a silicone container with decorating tips, similar to a pastry bag. This looked interesting as it appeared to be easy to fill. It has a big opening on the side and it can sit on it's own on the counter. I looked at the recipe booklet that came with my kit; it has recipes in 6 languages, unfortunately English clearly isn't their forte so I had to translate it a little....i.e. "icing sugar" is confectioners sugar..etc. I tried to find some ground almonds at Buschs and Meijer, but no luck. I think Bob's Red Mill makes it, but it wasn't that hard to make my own. I bought a 6 oz bag of slivered almonds and processed them on high in my food processor until they were ground fine, about a minute. Here's how I translated their recipe into something better suited for American cooks:
Vanilla Macarons Filled with Dark chocolate Cream
1 1/4 c. powdered sugar
3/4 c. ground almonds
3 egg whites
1 pinch salt
1/4 c. granulated sugar
1 t. vanilla
Filling:
1 c. Ghirardelli 60% cocoa chips
3 T. half and half
Using a fine mesh strainer, strain the powdered sugar into a bowl to remove lumps. Add almonds and mix well. Using a stand mixer with the whisk attachment, whip the egg whites, while adding the salt and the granulated sugar until obtaining a thick meringue. Add half of the powdered sugar/almonds and fold in....then add the vanilla sugar and the sugar/almonds and fold in gently until well combined,
Put the silicone mat on a cookie sheet. Fill the Decomax fitted with the large round tip and make circles in the size indicated by the inner circles on the mat. (I learned this the hard way because the instructions didn't indicate which circle I should use. When macarons rest before making, they expand....
I had to clean them up a bit before I put them in the oven with a spoon. Note to self: use inner circle next time! I'd also suggest tapping the sheet on the counter to remove any air bubbles, When the batter expands, it won't spill over and each macaroon will be the perfect size and shape. Allow to rest between 30-35 minutes at room temperature. Bake in a preheated oven at 300 F for 20-25 minutes until firm to touch. Repeat the process with the rest of the batter. I noticed some of mine stuck to the mat, I think next time I will spray it with a little non stick spray just to insure easy removal.
To make the filling, put the chips and the half and half in a microwave safe plastic bowl (plastic doesn't hold heat like glass....I learned this in my candymaking class with Tammy's Tastings) and heat in 10 second increments on high in the microwave until the chips are melted. Add more cream to make it spreadable if needed, Allow to rest at room temperature . Fill the macaroons with the chocolate cream. I used an offset icing knife to fill them.
Voila! Macarons...
It really wasn't difficult at all. I found the Decomax a little tough to use compared to a pastry bag....you press it with your thumbs and it is hard to get it fully empty, but the convenience of filling it and it can be washed in the dishwasher make up for it. It has other large tips that could be used for cake decorating or filling deviled eggs. I think it might come in handy for other recipes in my future....anything that doesn't require fine detail. I did a quick tally of my cost to make these macarons:
The tray makes 24 cookies...there was some excess meringue that yielded about 30 total, but for my estimate lets assume I made 24. Also, the bag of almonds made more than 3/4 c. but I'll assume I used it all:
Guess I'll be making these at home from now on! Also, I am glad I found out about Uncommon Goods just in time for Christmas shopping. I really like their selection and their mission. Great items for the kitchen, too!
When I was in high school, the first job I ever had was at Oakland Mall. I was a waitress at Olga's Kitchen, and I even though it was a bit of a drive from my house, I liked hanging out at the mall, even during Christmas. While I never really got tired of eating at Olga's....I still like eating their freshly tossed Greek salad with exactly one olive placed on top like a cherry on a banana split, and their delicious Olga bread (many moons ago, I clipped the recipe for it out of the Detroit Free press) it was always special to eat at the mezzanine restaurant at J.L. Hudson's. Hudson's was Detroit's fancy department store, it morped into Dayton-Hudsons, then into Marshall Fields and now it's Macys. Somewhere along the line, the nice restaurants faded away into a deli counter. I remember the salads the best at Hudsons, specifically the Maurice Salad, which is somewhat of a Michigan legend. I am not a huge fan of mayonnaise based dressings, but I make the exception for this salad. There is something magical about the combination of the sweet gherkin pickles and the dressing and Swiss cheese that is perfect. The recipe was printed a while ago in the Free Press, but at a whopping 750 calories per serving, I wanted to make something I could eat at lunch regularly. So here is my everyday version...brought down to a more reasonable 450 calories.
Maurice Salad
Serves: 6
Ingredients
2 teaspoons white vinegar
1½ teaspoons freshly squeezed lemon juice
1½ teaspoons onion powder
1½ teaspoons sugar
1½ teaspoons Dijon mustard
¼ teaspoon dry mustard
1 cup mayonnaise, reduced-fat
2 tablespoons dried parsley
2 hard-cooked egg, diced
Salt and freshly ground black pepper
1/2 pound ham, julienned
1/2 pound cooked turkey breast, julienned
1/2 pound Swiss cheese, julienned
½ cup slivered sweet gherkin pickles
1 head iceberg lettuce, shredded
pimiento-stuffed green olives for garnish (optional)
Directions
To prepare the dressing, in a small bowl combine the vinegar, lemon juice, onion powder, sugar, Dijon and dry mustard; whisk well to dissolve the sugar.
Whisk in the mayonnaise, parsley and egg, then season with salt and pepper to taste.
In a large bowl, combine the ham, turkey, cheese and pickles and toss lightly. Pour the dressing over the salad and gently fold together.
Arrange a bed of lettuce on each plate. Top with the meat and cheese mixture and garnish each serving with 2 olives and serve.
Now, if I could just find their recipe for Waldorf Salad....
In my mind, there are two iconic hippy restaurant cookbooks....
The first is the Bakery Lane Soup Bowl Cookbook, originally published in 1976. The Bakery Lane Soup Bowl was a restaurant in Middlebury, Vermont, and while not everything in is the stereotype earthy food (tofu, etc) it is so cozy and inviting in a 1970s kind of way you want to start cooking immediately upon reading it the first time. I looked for the book used for years (long out of print) before I found it finally. After much googling, I found that they owners closed it and moved to Arizona and opened a restaurant called Maude's (after their cat) but that one is closed now too. But the cookbook is a keeper!
Secondly, like Middlebury, Vermont, (a college town) there is Ithaca, New York and the iconic Moosewood Restaurant. The Moosewood still exists without one of the original members of the collective that started it, Mollie Katzen, but she wrote their first cookbook and I think it's their best. I loved Mollie's hand lettered recipes and hand drawn pictures. The cookbook is definitely more hippie style....i.e. vegetarian, tofu, etc. But just like Bakery Lane, it makes you want to cook something right just from reading it. The recipe for vegetarian chili in this book is the best I've tasted anywhere.
Since acquiring the Bakery Lane cookbook, I've been wanting to make the Fresh Apple Cake recipe, but never got around to it until today. At the beginning of the dessert chapter, the authors claim their desserts are worth the calories, and I think it's true. Facebook, via the King Arthur Flour post, reminded me of it this week, so I decided to make it for a brunch I was hosting with my friends Patty and Ellen. Perfect for a fall day....
Brunch!
Fresh Apple Cake with Caramel Frosting
Cake
2 1/3 cups all purpose flour
1 2/3 cups granulated sugar
2 teaspoons baking soda
3/4 teaspoon salt
1 1/2 teaspoons Apple Pie Spice
2 large eggs
1/2 cup (8 tablespoons) unsalted butter, softened
4 cups peeled, cored, chopped apple, about 1 1/3 pounds whole apples
1 cup diced toasted walnuts or pecans
Frosting
7 tablespoons unsalted butter
2/3 cup brown sugar
1/4 teaspoon salt
1/4 cup milk
2 1/4 cups confectioners' sugar
3/4 teaspoon vanilla extract
Preheat the oven to 325°F. Grease and flour a 9" x 13" pan. To make the cake: Mix all of the ingredients except the apples and nuts in a large bowl. Beat until well combined; the mixture will be very stiff, and may even be crumbly. Add the apples and nuts, and mix until the apples release some of their juice and the stiff mixture becomes a thick batter, somewhere between cookie dough and brownie batter in consistency.
Spread the batter in the prepared pan, smoothing it with your wet fingers. Bake the cake for 50 minutes, or until a cake tester or toothpick inserted into the center comes out clean, or with just a few wet crumbs clinging to it. Remove the cake from the oven and place it on a rack to cool completely; don't remove the cake from the pan.
To make the frosting: Melt the butter in a small pan over medium heat. Stir in the brown sugar and salt and cook, stirring, until the sugar melts. Add the milk, bring to a boil, and pour into a mixing bowl to cool for 10 minutes. After 10 minutes, stir in the confectioners' sugar and vanilla. Beat well; if the mixture appears too thin, add more confectioners' sugar. Spread on the cake while frosting is still warm.
I adapted this recipe is originally from the cookbook of the Family Parish Circle and Friends of St. John the Baptist Catholic Church in Hubbardston, Michigan. I bought it in the early 1990s at a farm stand near my future in laws house in Carson City, Michigan. I first made this peach pie on that September day at my in laws while we were visiting. It is the best peach pie I have ever had. It's a great "first pie" for a kid or an adult that's never made one before, because it has a press in crust. No rolling required.
Peach Pie
Crust
1 1/2 c flour
2 t sugar
1 t salt
1/2 c vegetable oil
2 T milk
Combine ingredients to form a soft pastry dough. It will be really soft, not like a rolled out crust. Press evenly into the bottom and sides of a 9" pie pan with your fingers
Filling
1/2 c powdered sugar
1/3 c flour
4 cup sliced peeled fresh peaches
1/2 t. mace
Combine and spoon into unbaked crust.
Topping
3/4 c flour
1/2 c packed brown sugar
1/2 t cinnamon
1/3 c soft butter
Preheat oven to 375 F, Combine for form a crumb mixture, spoon over peaches. Also, adding ground mace or pumpkin pie spice to the cinnamon is tasty, too. I love adding mace to peach desserts - I learned this trick from an excellent soul food cook named Irene who was a member of the Society of Women Engineers with me in the late 80s. Bake for 40-45 minutes, until the topping is lightly browned.
This year, I canned my favorite (and most difficult) item to put up: salsa. It's the one thing I make that I can't seem to have enough of in the house. This year, we ran out about April, so I made 33 pints. I bought a box of Roma tomatoes from Ruhlig's produce and commenced to prepare my favorite salsa recipe Salsa #5. I had to scale up the recipe based on the amount of tomatoes I had in my box, which was 26.3 lb, or about 3.78X the original recipe. It's very important to keep proportions accurate when making salsa, or you could end up with botulism. Here is my math:
It also was the maiden voyage on my new outdoor canning kitchen. I did break it in at a canning class that I taught last weekend. It was great to be able to can outside on such a hot day, plus, I could just hose off the garage floor when I was done. I still did all my chopping in my own kitchen, but I peeled the tomatoes on my camp stove instead of in the house and it was way better. Plus, the propane high burner can get my canner boiling in no time.
I ultimately used 2 boiling water baths at a time, which made the whole project, start to finish, get completed in a little over 4 5 hours. My friend Ellen stopped by to help for a couple hours.
My nest is now empty...my youngest has moved into his dorm and now I have all the spare time in the world to try out recipes. Just kidding, I don't have that much spare time, but I am looking forward to trying out some of the many recipes I have pinned in my "recipes I want to try" board on Pinterest. Due to my overzealous farmer's marketing, I ended up with a ton of Roma tomatoes, and my garden's basil was threatening to bolt, so it was time for me to try one of my pinned recipes for a roasted tomato soup. The original recipe can be found here, and when I first looked at it, I immediately questioned a few things. First, there was very precise weights for the tomatoes. ...2 1/4 lbs of Romas, 1 1/4 lb cherry tomatoes. Then the onions to be sliced "just under" 1/2 inch,,,,and then 2 cups (32 grams) of lightly packed basil leaves. This seemed a little too precise for me. Plus, there was no way that many tomatoes were going to fit on one baking sheet.
So I decided to use my stoneware bar pan (13x9) for as many tomatoes as I could fit and my half sheet pan for as many onions as I could fit. I tried roasting the tomatoes face up like the recipe suggested, but it really works better to do it face down to get the skins caramelized. Also, DO NOT pull off the skins as suggested. Roasting is the whole point of this recipe; pulling off the skins gets rid of all that flavor. I cut my onions about 1/4 inch, and left them in slices so they wouldn't burn....
I roasted them for an hour and a half, not the 45 minutes suggested because they were just getting a little soft after that short of a time. I also had some oregano from the market to use, so I added that. The recipe author suggested using an "emulsion" blender (I think she meant "immersion") but I found it easier to put the solids in a food processor instead. I hate vegetable broth - it has a nasty aftertaste, so I just used water to thin it and it was fine. To finish it off, I added a bit of sugar and some red wine vinegar to brighten it. My husband can't have dairy, so I just made garlic toasts instead. Delicious!
Here's how I changed the recipe to make it even better:
Roasted Tomato Basil Soup
Ingredients 2 1/4 lbs Roma tomatoes, halved lengthwise About 15 medium Roma tomatoes cut in half 1 1/4 lbs Cherry tomatoes 4 1/2 Tbsp olive oil 1/4 c olive oil divided
Salt and freshly ground black pepper (to taste)
8 cloves garlic, minced
2 small yellow onions, sliced just under 1/2inch thick 1/4 inch slice 2 cups (32g) lightly packed fresh basil leaves
1 cup basil leaves
1/2 cup oregano leaves
1.5 c. water
2 T sugar
2 T red wine vinegar Grilled cheese croutons (optional), see notes
Preheat oven to 425 degrees. Place tomatoes on a rimmed baking sheet and toss with 3 Tbsp half
olive oil then season with salt and pepper (place Roma halves cut side upright down). Place onion
slices and garlic on a rimmed half sheet and toss brush with remaining 1 1/2 Tbsp olive oil on all
sides, sprinkle with salt and pepper. Place baking sheet with tomatoes and half sheet with
onions in oven side by side and roast onions 1 1.2 hours. 30 35 minutes until edges are golden, and tomatoes 40 45 minutes until golden. Peel away any burnt papery layers of onions if there are any. Pull peels from tomatoes (I didn't do this with mine but later wished I would have so I'd recommend it so the soup isn't loaded with peels. If you want some peel then I'd peel at least half). Pour onions and tomatoes into a large pot. Add 4 cups vegetable broth and the basil. Season with salt and pepper to taste. In the large bowl of a food processor, pulse tomatoes, onions, herbs and garlic, Bring to a boil then reduce heat and simmer 20 minutes,
adding an additional 1 cup vegetable broth water to thin as desired. Blend soup with an emulsion blender or in small batches in a blender (only fill blender half full). Add sugar, vinegar, salt and pepper to taste, Float a small garlic toast on top if desired.
It's that time of year again....I have too many tomatoes, too much basil , green peppers, etc. We seem to be eating BLTs all the time. And the sweet corn! I bought extra today because it was only $1.50 for a half dozen, with the idea that I'd make corn chowder for work lunch this week. I googled around and all the recipes seemed too heavy with cream. I wanted to use bacon (and a little bacon fat) instead. I wanted something lighter, and to use up some of my garden extras. Time to improvise....here's how I made my corn chowder. I didn't to it this time, but could see even adding zucchini to this. Perfect for summer!
2 strips bacon, cut into 1/2-inch pieces
1/2 large yellow onion, chopped (about 3/4 cup)
1/2 cup small diced green bell pepper
4-5 ears of sweet corn, kernels removed from the cobs (about 3 cups), cobs reserved (this can be cooked already)
4 cups milk, whole or low fat
1 cup diced potatoes (1/2 inch)
2 small zucchini, diced (optional)
1 teaspoon fresh thyme leaves
1 t. turmeric
salt and pepper to taste
Garnish
diced fresh tomatoes
basil leaves, cut into thin strip
Place chopped bacon into a large, heavy-bottomed soup pot. Heat on medium heat until the bacon slightly browns and renders its fat, 3-4 minutes. Add the chopped onions and bell pepper lower the heat to medium low and cook until vegetables soften. Break the corn cobs in half (after you've stripped off the corn) and add the cobs to the pot. Add the milk. Bring to a boil and reduce heat to a bare simmer. Cover the pot and cook for 20 minutes. Make sure the heat is as low as can be and still maintain a gentle simmer. After 20 minutes, add the potatoes, Increase the heat to return the soup to a simmer, then lower the heat to maintain the simmer and cook for another 10 minutes. Discard the cobs add the corn kernels and zucchini and thyme and turmeric Again raise the heat to bring the soup to a simmer, then lower the heat and cook for another 5 minutes, until the potatoes are fork tender. Add salt and pepper to taste. Garnish with tomatoes and basil.
When I was a kid in the 1970s, zucchini bread was all the rage. I can remember grating tons of the garden's haul and freezing it so we could make it year round, but over the years, zucchini bread fell out of fashion. I think we all were duped into thinking it was healthy because it had a vegetable in it., but the fact is, it didn't really have a lot in it, and it was coupled with a hefty dose of vegetable oil. It should have really been called "cake". When I was watching America's Test Kitchen the other day, they optimized the recipe to pack it full of zucchini as well as lower the vegetable oil. I tried the recipe out the other day, and it was a winner. Here's how I made it....
kinda looks like meatloaf but it's zucchini bread!
Zucchini Bread
1 1/2 pounds zucchini
8 3/4 ounces brown sugar (about 1 1/2 c. packed)
1/4 cup vegetable oil
2 eggs
1 teaspoon vanilla extract
1 1/2 cups all-purpose flour
1/2 cup whole-wheat flour
1 tablespoon ground cinnamon
1 1/2 teaspoons salt
1 teaspoon baking powder
1 teaspoon baking soda
1/2 teaspoon ground nutmeg
1 tablespoon granulated sugar
Preheat oven to 325 degrees. Grease 8 1/2 by 4 1/2-inch loaf pan. Shred squash using a box grater, or even quicker, a food processor. Place zucchini in center of dish towel. Gather ends together and twist tightly to drain as much liquid as possible, discarding liquid.Whisk brown sugar, oil, eggs, and vanilla together in medium bowl. Fold in zucchini. Whisk all-purpose flour, whole-wheat flour, cinnamon, salt, baking powder, baking soda, and nutmeg together in large bowl. Fold in zucchini mixture until just incorporated. Pour batter into prepared pan and sprinkle with granulated sugar.
Bake until top bounces back when gently pressed and toothpick inserted in center comes out with few moist crumbs attached, 65 to 75 minutes. Let bread cool in pan on wire rack for 30 minutes. Remove bread from pan and let cool completely on wire rack before slicing.
This recipe is spiced with warm spices, but if you are not in the mood for those fall flavors, try this other summery zucchini bread recipe I made last year...raspberry zucchini bread. Looking back on this recipe from last summer, it feels really odd that my high school parenting days will be over. Right now, we'd be in the thick of marching band camp and then football two-a-days. This summer is different, my eldest decided to stay at school this summer for work, and my youngest will be taking off for college in a few short weeks. There's a corner in the spare room devoted to dorm room stuff already. Pretty soon, the nest will be officially empty!
It's the start of be cherry tomato season!! I've searched far and wide for a pasta salad recipe I really liked, and I think I've found one. It's based on Jamie Oliver's Best Pasta Salad recipe, but I tweaked it to make it better. I love orzo in a pasta salad because it makes it so much easier to eat.
Best Pasta Salad
8 ounces (half a 1 lb box) orzo
3 garlic cloves, minced
1 pint yellow cherry tomatoes, chopped fine
1 pint red cherry tomatoes, chopped fine
1 small can sliced black olives olives, chopped fine
2 T. fresh chives chopped fine
1/4 c fresh basil leaves, chopped fine
2 Persian cucumbers, diced small
3 garlic cloves, minced1/4 c white wine vinegar
3 T extra virgin olive oil
kosher salt
fresh ground black pepper
Prepare pasta per package directions. To dice the vegetables small, my favorite cooking tool is a food chopper.
It makes a fine dice of all these vegetables....cut the tomatoes in half first. Mix the pasta, herbs and vegetables together.To make the dressing, shake the garlic, vinegar and olive oil in a jar. Pour over the salad and mix well. Very refreshing and the ratio of veggies to pasta is higher than the typical pasta salad. We ate this on a camping trip with shrimp cocktail. We prepped it before we left and brought it in a cooler. I love to not have to worry about dinner the first night of camp!
My husband has decided he can't tolerate lactose anymore, so ice cream is out for us. Bummer! I tried this recipe for dark Chocolate sorbet and it is fantastic.
Dark Chocolate Sorbet
makes about 3 cups sorbet.
1 c sugar
2/3 c Dutch-process cocoa
pinch of salt
2 t espresso powder for enhanced chocolate flavor
1 4 0z bar Ghirardelli bittersweet chocolate, broken up
2 1/4 cups water
1 t vanilla extract
2 T vodka, optional; for enhanced scoopability
Combine the sugar, cocoa, salt, espresso powder, chocolate chips, and water in a saucepan set over medium heat. Bring the mixture to a boil and cook, stirring frequently, until the chips and sugar are dissolved. Remove from the heat, and stir in the vanilla and vodka. Transfer the mixture to a heatproof bowl, and refrigerate until thoroughly chilled; overnight is best. Freeze the mixture in your ice cream maker, according to the manufacturer's instructions. It'll remain quite soft; freeze for several hours before serving, to firm up. This recipe is based off ones from Ina Garten and David Liebovitz, I wonder if it's possible to make vanilla sorbet somehow? This is delicious! I could see making a thin mint version by using a few drops of mint extract. Speaking of thin, a half cup of this sorbet is only 3 Weight Watchers points.
My nest is almost empty. Actually, I know this isn't really true, because as I have been told repeatedly by many and have read about the millennial generation, my nest won't really be empty for quite some time. I guess it's more accurate to say my days of school parental involvement are almost over. My son will be graduating from high school two weeks from today...my last volunteer gig is only fitting; it will be my fifth and final time working the band uniform turn in at the high school after the Dexter Memorial Day Parade. My last days as a prom volunteer are now complete. I was a field chaperon at Michigan Stadium last night....
Eddie and Morgan
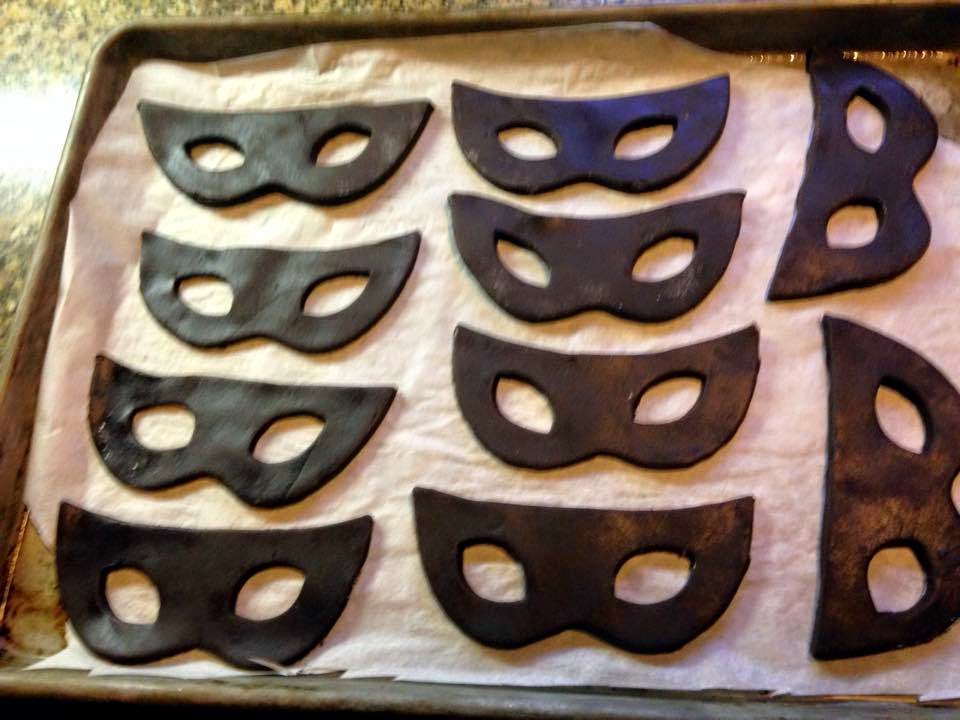
I also made cookies for this year's prom (theme: Masquerade). My friends Lori and Julie helped me, I wanted to try a dark chocolate cutout cookie recipe, since the prom colors were deep purple, silver and black.
I found a Martha Stewart recipe that looked interesting, but way too big of a hassle with sifting, freezing of the dough, etc. I decided to adapt it to make it easier.
Dark Chocolate Cutouts
(makes about 2 dozen large 4 inch cutout cookies)
3 c all purpose flour
1 1/4 c unsweetened cocoa powder
1/4 t salt
3 sticks unsalted butter, softened
3 c confectioners' sugar
2 large eggs, lightly beaten
1 teaspoon pure vanilla extract
Whisk together flour, cocoa powder, and salt in a medium bowl. Beat together butter and sugar with a
mixer until pale and fluffy. Beat in eggs, 1 at a time, and vanilla. Reduce speed to low, and gradually add flour mixture. Divide dough in half. Form each half into a disk, and wrap each in plastic wrap.
Refrigerate until firm but still pliable, about 1 hour.
Preheat oven to 350 degrees. Working with 1 disk of dough at a time, roll out to 1/4inch thickness on
lightly floured parchment. Cut into shapes with cookie cutters, rerolling scraps as needed. Bake until
crisp, 12 to 14 minutes, rotating once Let cookies cool for a few minutes before removing to a wire rack.
Making cookies like this is a 3 day affair: one day to bake, and two days to decorate with royal icing. I used Wilton #4 tip
for flooding and piping, and check out my post from last year's prom about the recipe and technique for royal icing.
I really loved this recipe! It went very well with my favorite cutout recipe for cream cheese cutouts (see last year's prom cookies recipe). As usual, my friend Marcia did an excellent job with the dessert table....
So, this is probably my last prom volunteering gig, but I still have a graduation party to work on, so my baking days aren't quite over yet. I had some leftover dough and icing that I have put in the freezer to see how it holds up. Stay tuned!
In these very busy times, people often ask me how I possibly
have time to preserve food and the answer is simple…I make time to do it. I have a 50+ hour week job and a husband and
kids, but I take the time to preserve food every year. Why?
First of all, canning provides me the opportunity to slow down and spend
some time with family and friends.
There is no “hurrying up” the process; the time it takes is what it takes. No shortcuts, except that many hands make the
work light. To borrow the old phrase
about “making hay while the sun shines”, Mother
Nature waits for no one. When
the strawberries are ripe, you’ve got a short window to make jam. No putting it off for a few weeks. I can remember coming home from a long work
week and spending a stormy Friday night with my friend Ellen putting up peaches
and drinking wine. Best happy hour
ever!
Preserving food grown locally
requires me to make a connection with a farmer. I have my favorite farmer’s phone numbers
programmed into my phone so a quick text
is all that’s required to know whether there’s a bushel of tomatoes waiting for
me to make into salsa. The foods I
preserve must be better (and often cheaper!) than what I can buy in the grocery
store. A jar of my homemade salsa is
way more delicious, and costs about half, of anything you can get on the
shelf. But the most important reason
why I preserve food is that when I open that jar months later, I have the
memory of making it. Currently, the jar
of pear vanilla jam shown above is sitting on my desk at work, getting ready to
be added to some yogurt and granola for my lunch. But just seeing it reminds me of last fall,
when I was deep in the process of making that pear vanilla jam.
At first, I was going to pick some pears from
my friend Liz’s tree, but by the time I got there, they were gone. As usual, Mother Nature had no time to wait for me. Then, in late fall, I drove out to the west side of the state to
meet up with some friends and on the way back, I stopped at a farm stand in
Michigan’s “Fruit Belt” to see what was left on the shelves. Nothing but pumpkins and apples, but then I
spied a bag of pears in the back! YES! I got back and the pears languished in the fridge a few
days. I carved out some time to make
the jam, adding some vanilla bean scrapings for good measure because I thought
it sounded good. The pear jam (along
with other items from the canning pantry like red currant jelly and wild grape
jam) were gifted to family and friends all through the holidays. My daughter and her boyfriend came home from
college for spring and had some for breakfast….they thought the label said
“Pearl Jam”, which made them laugh.
They loved it so I sent them back to school with a jar. And now a jar sits here with me in May in my
office, reminding me to take some time to enjoy it, and plan what I am going to
put up this summer.
In my efforts to try to preserve as many Michigan restaurant recipes as I can, I came across ham croquettes. Evidently, they were a very popular dish served at a famous Michigan based restaurant chain called Bill Knapp's. I had never had the chance to Bill Knapp's in my lifetime....I am not sure if we just didn't have them on the east side of Detroit, or that my mother deemed them "too expensive" so we never went. I had only started to hear about them in college. My Grand Rapids friend Rob said it was his 92 year old Grandpa's favorite place to eat out, largely because on your birthday, you got that percent off your tab. He was looking forward to surpassing his 100th birthday, so they would pay him to eat there. Also, on your birthday, you got your own "Celebration" cake. Not sure if Rob's Grandpa was able to collect on his 100th, but I was regaled by stories of all the old geezers that ate there. Bill Knapp's served family style food that was as comforting as a warm blanket.
In the late 90s. the BK chain was sold to an entrepreneur who tried to update the menu to attract a younger clientele, and it flopped miserably. They tried to change back, but too late for the blue haired crowd. The chain folded in 2002. Many of their recipes lived on in the internet, but not the ham croquettes. People keep asking for the recipe, but no one seems to have it. I asked my friend Ellen who worked at BK when she was a teenager. She remembered them, and said she thought they were "gross". Others remembered that they were served with chicken gravy. I joined a facebook group for ex BK employees and asked if anyone knew how they were made. I got lots of interesting comments about them..."I believe it was breaded SPAM"...."they were nasty"...."they were probably the worst item on the menu. The folks who ate them were also the folks who ate with us four - five nights a week and had a fit when coffee went up to 30 cents"...."they were easy to gum down",.. etc. Now I was really fascinated, because there are so many people looking for the recipe, but the staff thought otherwise. I had to figure it out.
Mind you, I am a big fan of anything breaded and deep fried, and I have a lot of ham in my freezer. So I decided with Easter coming up, it was time to experiment. On the internet, I found lots of recipes. I didn't know it, but ham croquettes aka Croquetas de Jamón are a popular tapas dish. They are also known as Cuba's national appetizer. I found one really lame recipe that claimed to be Bill Knapp's but it used Crisco and sounded pretty bland. I found another that was from a 1960s Better Homes and Gardens Cookbook that used curry powder, which sounded interesting. I asked Ellen if the BK version had curry powder and she said "Of course not!" But I liked the idea of curry powder in it. I asked Ellen if they were served with chicken gravy and she confirmed it. "What sides were served? Noodles? " I asked. "No, mashed potatoes and maybe some canned corn". So, I was off on my own again. I looked over all the recipes and decided I'd try one like Bill Knapp's, and another one with some added curry powder. They both came out delicious! I had my doubts about the non curry one, but it let the onion gently flavor the ham. I understand the "easy to gum down" comment, too. The croquettes are made with minced ham, which is easy to chew. I decided to go with noodles because I love chicken gravy with noodles and I was too tired from deep frying to make any mashed potatoes.
Bill Knapp's Style Ham Croquettes
3 tablespoons butter
1/2 teaspoon curry powder (optional)
1/4 cup all-purpose flour
3/4 cup milk
1 T prepared mustard
1 lb cooked ham coarsely diced
1/4 onion coarsely diced
2/3 cup dry bread crumbs
1 egg, beaten
2 tablespoons water
Oil for deep-fat frying
In a saucepan, melt butter; stir in curry powder and flour. Gradually add milk. Bring to a boil; cook and stir for 2 minutes or until thickened. Remove from the heat. In a food processor, process ham and onion until meat is chopped very fine. Add to saucepan and cool thoroughly. With wet hands, shape mixture into 10 balls. Roll balls in bread crumbs; shape each into a cone. Whisk together egg and water. Dip cones into egg mixture; roll again in crumbs. Heat about an inch of oil in a dutch oven to 375°. Fry croquettes, a few at a time, for 2 to 2-1/2 minutes or until golden brown. Drain on paper towels; keep warm. Serve with chicken gravy.
Today is the 148th anniversary of Laura Ingalls Wilder's birth. When I was a young girl, I read all of the Little House books so often, the covers fell off. I can still quote from them by chapter and verse like a good Baptist quoting the Bible. I can still remember their hog butchering party where Laura burnt her tongue on the sizzling swine tail and she and Mary played with the pig's bladder blown up like a balloon. One of my fondest memories is that of the maple sugaring off in the Big Woods, where Ma had the girls gather up pan fulls of snow to make maple candy. To celebrate Laura's birthday as well as the warmish day we are having here today, I decided to give it a shot myself.
First, I filled a cake pan with some snow and packed it down....
I left it on the grill to stay cold while I heated a half cup of maple syrup (the real deal) to the "soft ball stage" i.e. 235 F...
Then, I stirred it quickly to get the bubbles out and poured it on the snow...
It was delicious - like a soft taffy. The teenagers loved it too...I wish I would have tried making it when they were younger. It has to be ate right away or it will dissolve in the melted snow. Happy Birthday Laura!